
 |
| iTunes |
So after pondering my predicament for about 30 seconds, I decided to move my iTunes media off of my MacBook and onto my NAS (FreeNAS) storage. This will allow me to keep and expand my media library and it will free up some space on my MacBook. This post is all about how to move your iTunes media to FreeNAS.
If you are new to FreeNAS and need help setting it up then check out my Using Apple Time Machine with FreeNAS post.
Before we can do anything, we need a place to put iTunes media on FreeNAS. So, SSH into your FreeNAS server and create a directory. I called mine "iTunes."

Now that we have a folder created for our iTunes media, we need a share. Since I will be connecting with my MacBook, I will create an AFP share. However, for you Windows folks out there, you can create a SMB/Samba share that you can use to map it as a drive on your Windows computer.
To create an AFP share, just log into FreeNAS using the web interface with the default admin credentials (admin/freenas). Next, select Services->AFP from the FreeNAS drop down menu.

When the AFP admin screen comes up, select the Shares tab and then click the blue cross to create a new AFP share.
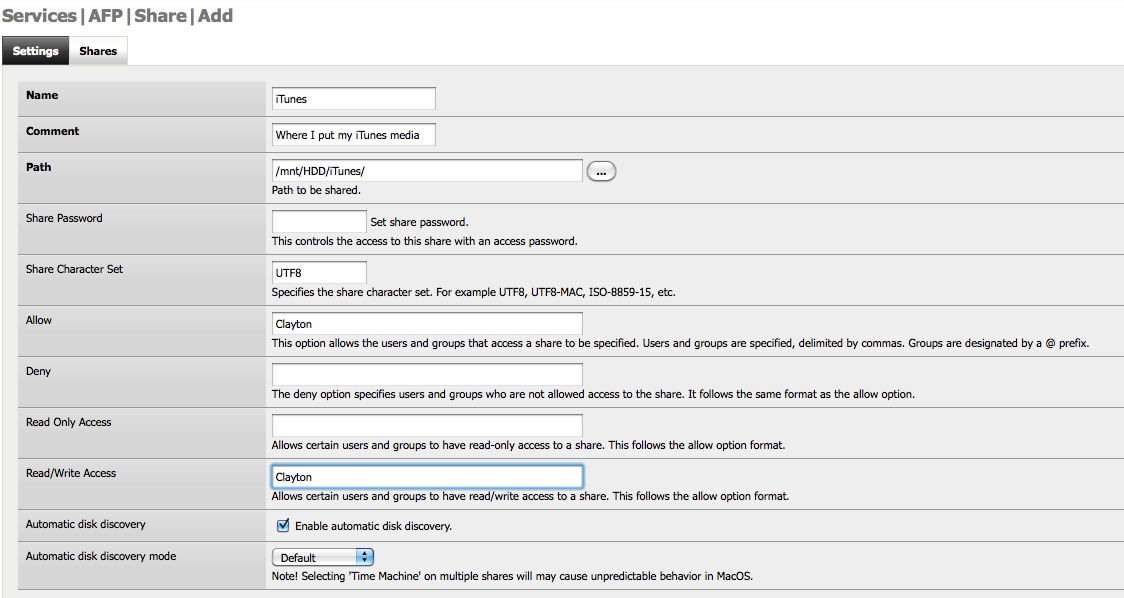
Select the location of the share (e.g. /mnt/HDD/iTunes) and make sure you give yourself access. In my case, I only specified myself as having access. But you could give access to several users or a group if you are sharing a media library.

Once you click Add then you are asked to confirm your changes by clicking the Apply Changes button. So, go ahead and click that button. Now you have an AFP share on FreeNAS that can store your iTunes media files.
To move your iTunes files to your FreeNAS AFP share, open a Finder window and select Go->Connect to Server. Enter the IP Address for the Server Address. A dialog box will then pop up asking you which share you want to connect to; select the iTunes share.

Now, it's simply a matter of copying your iTunes library to your iTunes AFP share on FreeNAS and changing your iTunes preferences. If you're curious about how that works, check out this KB article from Apple: http://support.apple.com/kb/ht1449


No comments:
Post a Comment